here y'all, enjoy!
:D
as taken from smittenkitchen.com
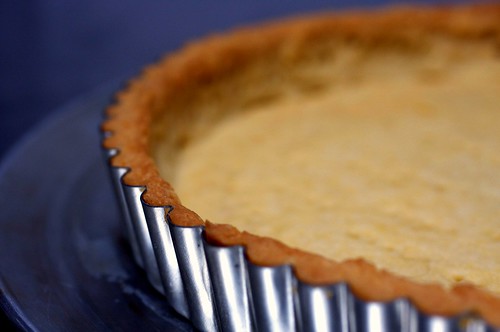
the great unshrinkable sweet tart shell
I have lamented tart crusts for years, as it seemed that no matter what I did–chill the crusts, weight the crusts, arranged small prayer circles outside the oven–they shrunk on me. No matter how many fingers I crossed, no matter how many Guaranteed No-Fail tricks I auditioned, no matter how many pounds of butter I had sacrificed in my quest, the crust I’d remove from the oven would hold as little as half of the volume of the one I put in, leading to thin tarts and pools of extra filling and oh so very many gray hairs.
Which is why today it is taking all of my restraint not to run up that last flight of stairs and shout from my rooftop: I have conquered my tart shells at last, and they shrink no more! … Although I suspect in my neck of this island, that would barely cause an eyebrow to arch.
But it is true, so deliciously true. And before I go any further–you know, into the most awesome stuff I filled this tart crust with–I need to mark this momentous occasion its own post. Go bookmark this one, my friends, because if you’ve ever sobbed at the doorway of your oven, wondering where oh where your tart walls went, you’ve waited too long for this.
One year ago: Nutmeg Maple Cream Pie
Two years ago: Orangettes
The Great Unshrinkable Sweet Tart Shell
Adapted from Dorie Greenspan
My favorite part about this shell recipe and technique is that it doesn’t require pie weights. How cool is that?!
Makes enough for one 9-inch tart crust
1 1/2 cups all-purpose flour
1/2 cup confectioner’s sugar
1/4 teaspoon salt
1 stick plus 1 tablespoon (9 tablespoons; 4 1/2 ounces) very cold (or frozen) unsalted butter, cut into small pieces
1 large egg yolk
1. Pulse the flour, sugar and salt together in the bowl of a food processor. Scatter the pieces of butter over the dry ingredients and pulse until the butter is coarsely cut in. (You’re looking for some pieces the size of oatmeal flakes and some the size of peas.) Stir the yolk, just to break it up, and add it a little at a time, pulsing after each addition. When the egg is in, process in long pulses–about 10 seconds each–until the dough, which will look granular soon after the egg is added, forms clumps and curds. Just before you reach this stage, the sound of the machine working the dough will change–heads up. Turn the dough out onto a work surface and, very lightly and sparingly, knead the dough just to incorporate any dry ingredients that might have escaped mixing. Chill the dough, wrapped in plastic, for about 2 hours before rolling.
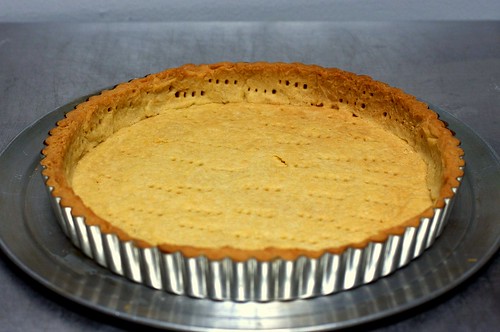
2. To roll the dough: Butter a 9-inch fluted tart pan with a removable bottom. Roll out chilled dough on floured sheet of parchment paper to 12-inch round, lifting and turning dough occasionally to free from paper. (Alternately, you can roll this out between two pieces of plastic, though flour the dough a bit anyway.) Using paper as aid, turn dough into 9-inch-diameter tart pan with removable bottom; peel off paper. Seal any cracks in dough. Trim overhang to 1/2 inch. Fold overhang in, making double-thick sides. Pierce crust all over with fork.
Alternately, you can press the dough in as soon as it is processed: Press it evenly across the bottom and up the sides of the tart shell. You want to press hard enough that the pieces cling to one another, but not so hard that it loses its crumbly texture.
3. Freeze the crust for at least 30 minutes, preferably longer, before baking.
4. To fully bake the crust: Center a rack in the oven and preheat the oven to 375 degrees F. Butter the shiny side of a piece of aluminum foil (or use nonstick foil) and fit the foil, buttered side down, tightly against the crust. And here is the very best part: Since you froze the crust, you can bake it without weights. Put the tart pan on a baking sheet and bake the crust for 25 minutes.
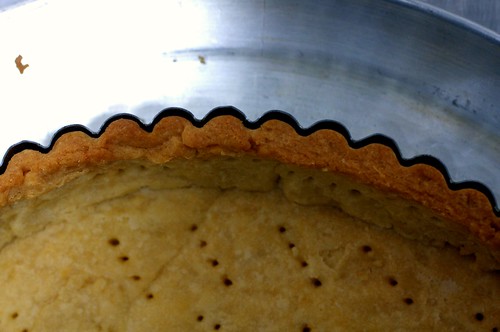
5. Carefully remove the foil. If the crust has puffed, press it down gently with the back of a spoon. Bake the crust about 10 minutes longer, or until it is firm and golden brown, brown being the important word: a pale crust doesn’t have a lot of flavor. Transfer the pan to a rack and cool the crust to room temperature, and proceed with the rest of your recipe.
Do ahead: The dough can be wrapped and kept in the refrigerator for up to 5 days or frozen for up to 2 months. While the fully baked crust can be packed airtight and frozen for up to 2 months, the flavor will be fresher bake it directly from the freezer, already rolled out.

No comments:
Post a Comment